Wainscoting, guide on product installation
What is Wainscoting?
 Wainscoting wooden paneling installations are not an easy task. But with the right planning and proper tools it can be done by almost anyone. There are many tools needed, and some carpentry skill too. I will get more into that in a little bit. First what is Wainscoting? Traditionally, wainscoting is a wood material that is attached to the bottom portion of a wall throughout a room, although, now one may find it any verity of materials from natural to synthetic. Wainscoting will add the decorative and protective quality you’re looking for when you finally decide it’s time to remodel your home or redecorate.
Wainscoting installation, Tools Needed.
As mentioned above there are many tools needed when getting ready for your wainscoting installation. Many of these tools are not for the novice carpenter and could cause some serious injuries.
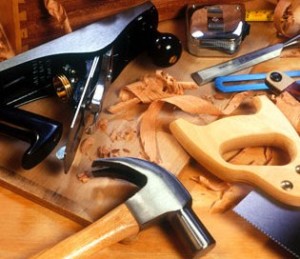
- Tape Measure
- Pencil
- Saws; table saw, miter saw, circular saw, jig saw
- Levels
- Air compressor with nail guns ( 18 gauge 2″ nails )
- Square
- Caulk gun with; caulking and liquid nails
Wainscoting Panel Planning
First make sure that the walls you plan on working on are clean and that you have removed the old baseboard. Measure your walls and come up with a design in which you want you wall paneling to look like when finished. I would say that this is the most important phase of your project. If you go wrong here, there’s a great chance that material will be lost and the project will become longer and much more expensive. #1 Rule in Carpentry ” Measure Twice, Cut Once.” Decide your wainscot height. Divide the width of the wall by the number of panels you’d like.
DIY Wainscoting Installation
 Once you have a design ready and have all the measurements you are now ready to start cutting up wood. Make a level chalk line around the entire room, set at the height of your wainscoting minus the height of the Cap Molding. Use a table saw to cut 1/2 inch plywood, to fit between the level line. It’s okay to have a little wiggle room so leave about an inch from the floor. Rip the panels so that the seams will be covered by the stiles. Apply panel adhesive to the back of each piece with a caulk gun and press it in place. Shoot some finish nails in the corners to help hold the panels up while the liquid nails dries.
Cut the 3/4″ top rail and the bottom rail to the length of the wall using a miter saw. Have a helper hold the top rail up to the level line. Using a nail gun and working from one end to the other, nail through the rail and into the studs with 2-inch nails. Now cut the stiles, making sure to cut all to the same size, which was determined in the planing stage. If the top rail is level your bottom rail will also be level because your stiles are the same size. Snug the bottom rail up against the ends of the stiles and wedge shims between it block to tighten the joints. (The new baseboard will cover any gaps.)
Nail scraps from the 3/4″ rail to pad out for the baseboard and bring its face flush with that of the bottom rail. Set the baseboard in place and shim the low-end until the piece is level. Measure the biggest gap between the bottom of the baseboard and the floor, and cut a scrap block to this size plus ¼ inch. Run the block along the floor against the baseboard with a pencil on top to scribe a cut line on the piece. Rip the baseboard using table saw. Leave a light 1/16″ on the bottom and use an electric sander to fine tune the baseboard to the floor. Nail the baseboard on using the 18 gauge nails.
Now prep the chair-rail molding, cut it to size and nail it flush with the top of the top rail. Depending on the type of char-rail you buy you will need to have a cap molding too. Cut this to size and nail it to the top of the rail and chair-rail. Set the cap in a bed of caulk and nail it to the ledge formed by the apron and upper rail using a nail gun.

If needed add Shoe Molding to the baseboard. It will not only allow you to close up all gaps but will also add to the over all design of the wainscoting installation. Miter panel molding at 45 degrees to line the inside edges of the panels. For thicker trim, nail it in place with a nail gun and 1½-inch finishing nails. Once all the pieces are installed, fill all nail holes with wood filler. Sand the surfaces, prime the plywood, and finish the project with several coats of paint. Vacuum all the dust off of the wainscoting and lastly apply caulking to all the minor gaps that you might still have. You now are ready for paint. Choose a semi-gloss paint and apply two coats for a stunning finish. And don’t Forget to compliment your wainscoting with quality crown molding installation.


