Coping Crown Molding
Coping Crown Molding “Tips form The Trade”
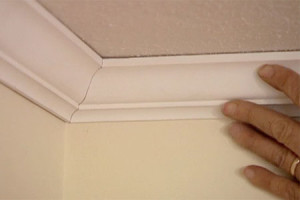
The hardest part of installing crown molding is cutting the corners. You can’t do it like any other trim pieces because the molding sits at an angle between the wall and the ceiling. Some say that coping crown molding is the easiest way to cut crown molding corners. I think that a mitered joint gives you the flexibility to adjust your cut. But coping crown molding is good for a crown molding installer that is beginning and has little experience. Any gap in a coped cut can be easily concealed with a little bit of caulk. A coping saw will be needed for this type of crown molding installation.
Another tool that will make the job easier is a power miter saw. It’s accurate and makes a cleaner cut than a plastic miter box.
Coping Crown Molding Method
- Once you determine the length, take the molding to the saw and cut in a straight line at a 90-degree angle you want both ends of the molding to butt against the side walls. If you are installing crown molding using the coping method start off with the long walls and make straight cuts.
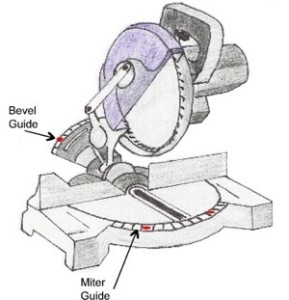
- Move the miter saw guide to the 45-degree angle point and stand the molding into place, it is crucial that you hold the molding in the same way it will be installed on the wall. The edges need to be pressed firmly against the saw table and the vertical side fence. This is the first key to a straight cut and a good fit.
- Second tip is not too obvious and can be confusing. The molding is upside down, meaning the edge against the vertical fence is the bottom of the molding and the edge against the table is the top of the molding (think of your table as the ceiling). This is also known as “upside-down and backwards”. It is vital to make sure you cut the molding angle in the right direction.
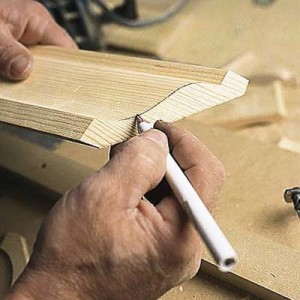
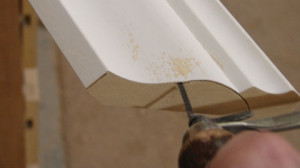
- Now you will cope the joint cut with the 45-degree angle. When you cope a joint, you scribe the end of one molding to the face of the other. It helps to color the front edge with a pencil or a sharpie and then use the coping saw to
 cut near enough to the line as possible. Start slowly, so you don’t damage the edge of the molding. Cut on a back angle, this will help when placing the crown molding profiles together. Try to segment small pieces this will make your coping easier. I always use 100 grit sand paper to finish off my coped edges. This gives me a nice tight joint when I install coped crown molding.
 - Next you will want to test fit the molding on a scrap piece of molding. By doing this it eliminates the need of taking down a piece of molding which does not fit well.
- Now install the coped crown molding on the wall. One thing I always do and it works like a charm is to cut my coped crown molding a 1/8 inch bigger than the actual wall dimension. This helps create pressure on the coped molding edge and closes any fine gapes that might occur otherwise.
- With all that you will still need to miter the outside edges of the crown molding. Coping Crown Molding only works on inside corners.
For more information on Coping Crown Molding. Follow us on Google+ , and Like us on Facebook, Or on Twitter or find us on Houzz


